
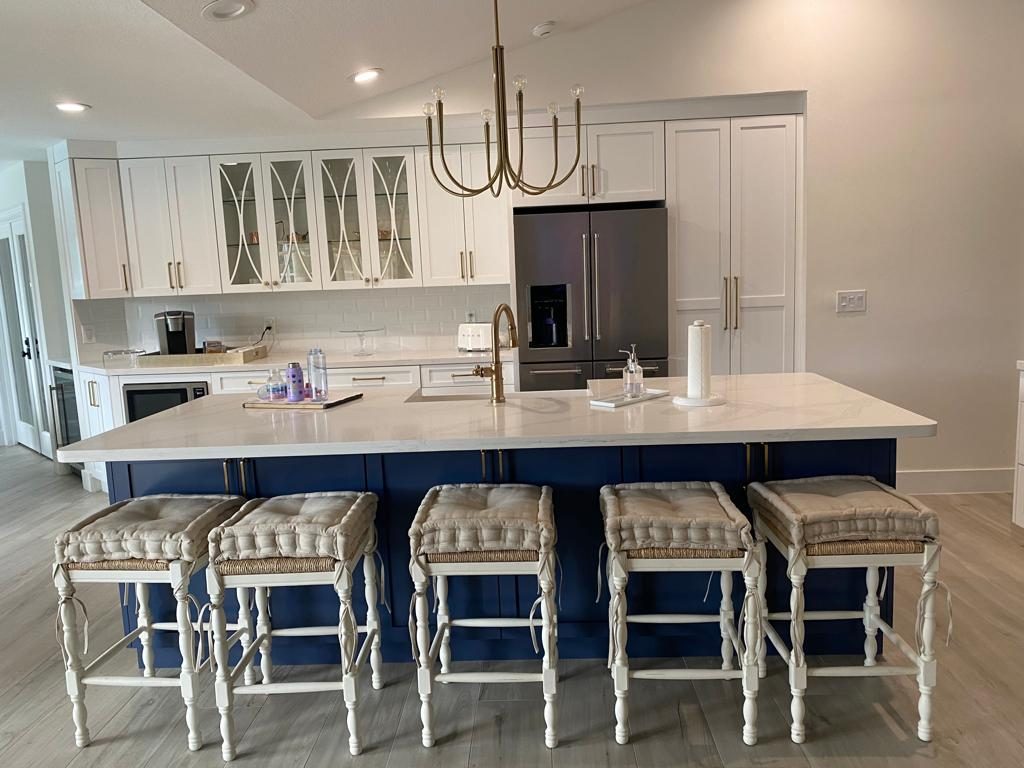
Good kitchen lighting uses three layers: ambient, task and accent light. Each layer does a different job. When you plan all three before the walls close, your kitchen feels bright, useful and comfortable. This guide explains each layer and shows how to plan outlets and switches early in a Vero Beach kitchen remodel.
Why layers matter in a Florida kitchen
Florida homes get a lot of bright sun. Many kitchens also open into a living room, a dining area or a patio. One ceiling light rarely does all the work. A layered plan lets you turn on the right light for cooking, for a family breakfast, or for a quiet evening.
Layers also make a room feel warm. Harsh light from one fixture can make cabinets look flat and counters look dull. Soft, spread-out light makes the whole space feel finished.
Layer 1: Ambient light
Ambient light is the general light for the whole room. It is the base layer. In most kitchens it comes from recessed lights, flush mount fixtures or a central ceiling light. Spread the fixtures evenly so no corner feels dark. Put this layer on a dimmer so you can soften the room at night.
Layer 2: Task light
Task light is focused light for work areas. It helps you chop, read recipes and clean up without your own body casting shadows. Under-cabinet lights are the most common choice. Place them at the front edge of the upper cabinets so the light falls on the counter, not on the wall behind it.
Task light also helps over the sink and at the range. Choose a light color that makes food look natural. Many homeowners pick a warm white for a cozy look and a slightly cooler white for work areas. Try both before you buy.
Layer 3: Accent light
Accent light adds interest. It draws the eye to the things you like. Common accent lights include pendant lights over an island, lights inside glass-front cabinets and toe-kick lights under the base cabinets. Accent light is often the layer that makes a kitchen feel custom.
Use accent light with care. Too many small lights can make a room look busy. Pick one or two focal points and build from there.
Plan outlets and switches before the walls close
The best time to plan lighting is before drywall goes up. Once the walls are closed, adding a switch or outlet means cutting, patching and painting again. A short planning list helps you avoid that work.
- Mark each light on the layout. Walk the room with the cabinet plan in hand. Note where ceiling lights, pendants and under-cabinet lights will go.
- Place switches where you enter. Put the main switch near the doorway you use most. Add a second switch or dimmer near the island or range if you want control there.
- Add outlets above the counter. Plan outlets for under-cabinet lights and small appliances. Place them where you will not need an extension cord.
- Think about pendants early. Pendant lights need a junction box in the ceiling above the island. Mark the center point before the framing is closed.
- Plan for controls. Smart switches and dimmers need the right wiring. Ask your contractor which controls work with the fixtures you pick.
Test your plan before you build
Before the electrician starts, test your plan on paper. Walk through a normal day in the kitchen. Start with breakfast, then picture lunch prep, dinner cooking and cleanup after dark. Ask yourself where you stand, where you reach and where you look. Each step shows a light you may need or a switch you may have missed.
Bring the cabinet and counter samples into the room, if you can. Lighting looks different against wood, white paint or stone. Check the color on a sample board under the light you plan to use. This small step can save a lot of regret later. Take a photo of the plan and share it with everyone who uses the kitchen, so each person can speak up before the work begins.
Florida-specific tips
Florida kitchens deal with heat, humidity and storm season. Choose fixtures made for damp locations if they sit near a sink or an outdoor door. Look for finishes that resist moisture. If your home is close to the coast, ask about materials that handle salt air. Good fixtures last longer and look better through the seasons.
Think about power backup too. If you want a generator plug or a battery backup circuit, plan it with the electrician during the remodel. Bringing it up early keeps the project on schedule.
Common lighting mistakes to avoid
- Using only one ceiling light for the whole room.
- Placing under-cabinet lights too far back, so they shine on the wall.
- Forgetting a switch at the entry.
- Choosing a light color that does not match the cabinets or counters.
For more planning ideas, read our guide to kitchen remodeling in Vero Beach. To see the full scope of our work, visit our kitchen remodeling services.
Ready to plan your kitchen lighting? Urban Remodeling offers free estimates for homes in Vero Beach, Sebastian, Fort Pierce, Port St. Lucie, Stuart and Melbourne. Call (772) 404-8397 to request yours.
Thinking about this project?
Request a free estimate: (772) 404-8397. We’ll walk the space with you and put a written price in front of you.
Call (772) 404-8397 Request a Free Estimate