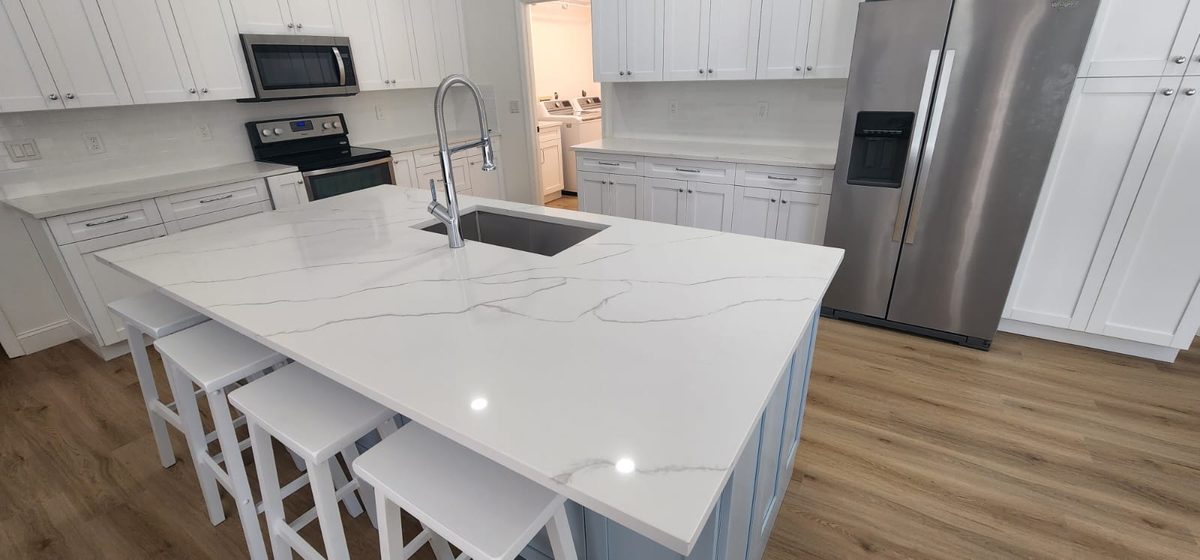
A kitchen remodel moves through a clear set of phases, each one building on the last. The work usually starts with demolition, then moves through rough-in trades, inspections, cabinets, counters and finish work. Knowing the order helps you plan your life around the project and ask better questions along the way.
Before Week One: Planning and Scope
Good timelines start before any tools come out. Your team should walk the kitchen with you, confirm the layout and talk through materials. You should also receive one written scope that lists what is included. That document becomes the roadmap for every phase that follows.
Use this time to make decisions. Choose cabinet styles, counter materials, appliance sizes and flooring. Late changes often slow the work, so settle the big choices before demolition begins.
Early Weeks: Demolition and Protection
Demolition is the first visible step. Cabinets, counters, flooring and sometimes walls come out. The crew also protects the rest of the home with plastic sheeting and dust barriers. Expect noise and dust during this stage.
This is a good time to clear out the kitchen completely. Move small appliances, dishes and pantry items to another room. Set up a temporary kitchen with a microwave, a mini fridge and a sink station if you can. That setup makes the next few weeks easier.
Rough-In: Plumbing, Electrical and Ventilation
Once the room is open, the rough-in trades arrive. Plumbers move or add supply and drain lines. Electricians plan new outlets, lighting and circuits for appliances. Ventilation work places the range hood duct in the right spot. These trades work inside the walls and ceilings, so their work is hidden once the room closes up.
Ask your team to show you where each line runs before anything is covered. A quick walkthrough now can save headaches later, especially when you want an outlet in a specific place on the island.
Inspections Keep the Work on Track
Many kitchen remodels need inspections at key points. Typical checkpoints include rough electrical, rough plumbing and framing. An inspector looks at the work before walls are closed. Permits are pulled for you, and inspections are handled as part of the job, so you do not need to chase them yourself.
Inspections can pause the schedule for a short time. Plan for that possibility. A good team will tell you when an inspection is scheduled and what it covers.
Insulation, Drywall and Paint
After inspections pass, the walls and ceiling get insulation and drywall. Taping, mudding and sanding follow. This stage creates a lot of dust, even with protection in place. Once the surfaces are smooth, the room is ready for primer and paint.
Choose your final paint colors before this stage if you can. Test samples on the drywall, and look at them in morning and evening light. Color changes after walls are finished can add time to the job.
Cabinets Go In
Cabinets arrive and go in once the walls are ready. The crew checks that the boxes are level and plumb, then fastens them to the wall and to each other. Doors and drawers are adjusted so they close evenly. This is one of the most visible changes, and it often makes the kitchen feel real for the first time.
Watch for small details here. Make sure the sink base lines up with the plumbing, and check that the fridge opening fits the planned width. Catching a problem at this stage is much easier than fixing it later.
Counters and Templates
Counters are usually measured after the cabinets are set. A template is made so the stone or other material can be cut to fit. The counters are then installed, with seams placed where they are least visible. Sink and faucet holes are cut at this point.
Ask where the seams will fall before the counter is cut. Good planning keeps seams away from the sink, the cooktop and the main work zone.
Backsplash, Flooring and Trim
The backsplash goes in after counters are set. Tile is set, grouted and cleaned. Flooring follows, and it should be installed with a plan for transitions into nearby rooms. Trim and baseboards finish the edges. Small details like these make a big difference in how polished the room looks.
Appliances and Final Fixtures
Appliances arrive near the end. The team connects the range, dishwasher, fridge and sink. Light fixtures, outlet covers and cabinet hardware go in next. Test each appliance, run the water and check that the lights work from every switch.
Keep the appliance manuals and paperwork in one folder. You will be glad to have them when you need to clean or service the equipment later.
The Final Walkthrough and Punch List
Near the end, walk the kitchen with your team. Look for scratches, uneven gaps, loose hardware and paint touch-ups. Make a short punch list and agree on who will handle each item. A calm walkthrough helps you leave the job feeling confident.
Take photos of the finished kitchen. You will want a record of the work for your own files and for future projects.
Common Timeline Mistakes
- Changing choices mid-project. New decisions can pause the work while materials are reordered.
- Ignoring the protection plan. Dust reaches the rest of the home quickly without barriers.
- Skipping the walkthrough. Hidden lines are easier to check before they are covered.
- Expecting no delays. Inspections and deliveries can shift the schedule.
How to Keep Your Life Running Smoothly
Set up a small station for daily needs. Plan simple meals and keep a clear path to the bathroom. Ask the crew what time they arrive and leave, and where they park. Clear communication keeps the work moving and the household calm.
Also plan for the noisy days. Schedule calls or errands for those times, or work from another room if you can. A little planning helps the family handle the dust and sound.
Remodeling Across the Treasure Coast
Urban Remodeling serves Vero Beach, Sebastian, Fort Pierce, Port St. Lucie, Stuart and Melbourne. Our team works with homeowners in each area on kitchens, bathrooms, whole-home projects, flooring, outdoor kitchens and patios. If you are curious how a kitchen project fits into a larger plan, read our guide to kitchen remodeling in Vero Beach.
Next Steps for Your Kitchen
Start by writing down what you want to keep and what you want to change. Gather photos, measurements and inspiration images. Then talk with a team about your options. Our kitchen remodeling service page explains how we plan and build each phase.
Urban Remodeling offers free estimates and walks through one written scope with you before work starts. Call (772) 404-8397 to request your free estimate and talk through your kitchen plans.
Thinking about this project?
Request your free estimate today. We’ll walk the space with you and put a written price in front of you.
Call (772) 404-8397 Request a Free Estimate